DIY Cage Construction
Step by Step Tutorial
by Geri Nielsen
Wire cages for holding floral foam are a useful mechanic for floral designing.
Floral Artists have recently become concerned about the environmental impact of Floral Foam. The new focus is on attempting to design without using floral foam or at least trying to use less. Manufacturers of floral foam are currently researching and testing fully biodegradable foam and whenever possible these new environmentally sensitive products should be used. There are certain design situations where the use of floral foam is a necessity, such as in large installations, exhibitions staged outside or floral shows running over several days, as well as in designs for floral theatre.
Therefore in these situations, it is handy to know how to create your own cages. Here is a DIY instruction on how to construct a simple 7.5 x 10 x 5 cm cage out of Galvanized Square Welded Wire Netting that can be purchased in a roll from local hardware stores.
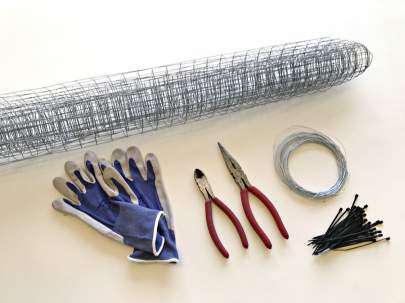
Materials Required:
Square Wire Netting (2.5 cm squares), light gauge binding wire or cable ties.
Tools required: Wire cutters, needle nose pliers, gloves (to protect hands from sharp wire ends).
Method:
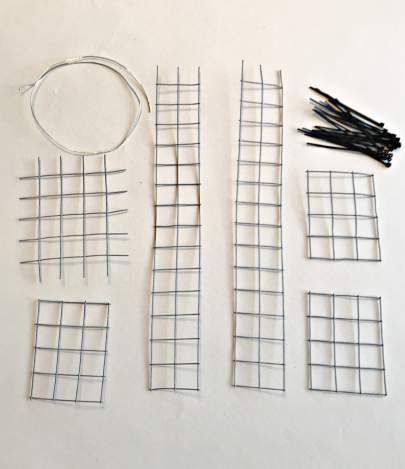
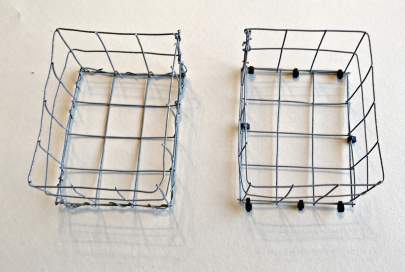
Step 1: Cut the following from the roll of square wire netting:
1 piece - 2 squares wide and 14 squares long with the 3 wire ends attached
on one end (see example shown).
1 piece - 3 squares wide and 4 squares long with wire ends attached on all
sides (see example shown).
1 piece - 3 squares wide and 4 squares long with NO wire ends attached.
1 piece - binding wire 50 cm long (approximately).
(When using cable ties the sharp wire ends are removed and binding wire is not required.)
Step 2: Bend the 2 square wide piece of wire netting at 4 x 90° angles to form a square that is 3 squares wide and 4 squares long. Use the wire ends to secure. Sharp 90° corners can be created by bending the netting over a block of wood or sharp table edge.
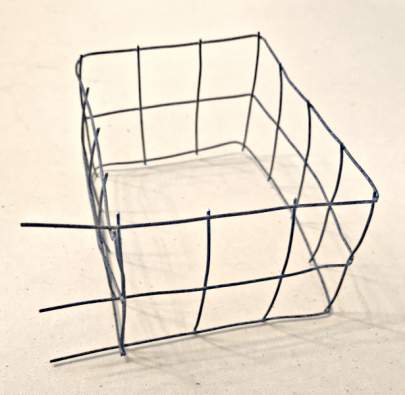
Step 3: Create the bottom of the cage by attaching the 3 x 4 square piece using the end wires by twisting them along one edge of the 2 square wide piece or use cable ties.
Step 4: Create the lid of the cage by attaching the 3 x 4 square piece to one of the 4 square sides of the cage using the binding wire or cable ties thus creating a hinge.
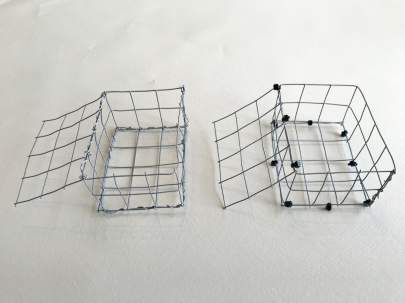
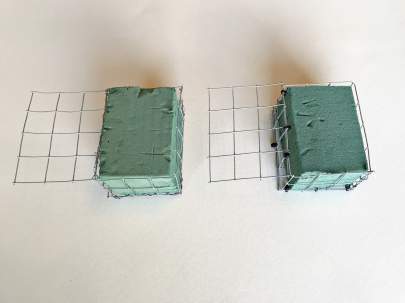
Step 5: Cage is now ready to accept a block of floral foam cut to the correct size, inserted inside the cage, and then the lid can be wired closed or use cable ties.