Articles & Step By Step Tutorials
Learn new design styles and discover new techniques with these articles from Floral Focus magazines, and step by step tutorials.
Categories
- Step By Step Tutorials
- Colour Tutorials
- Techniques Tutorials
- Innovative Design Tutorials
- Styles Tutorials
Recent Articles


Step by Step - String Fling
Step By Step Tutorials Techniques Tutorials
A step by step design
by Annette Waller
You will need
- 3 lengths of 3.15 mm Ferrox Rods
- black insulation tape
- black paper tape
- blunt nosed pliers
- kebab sticks
- cotton string or jute twine
- Container: a low pottery or glass container or a tall container with small bottle like opening
- Plant material: 2 or 4 form flowers, 1 or 2 form leaves
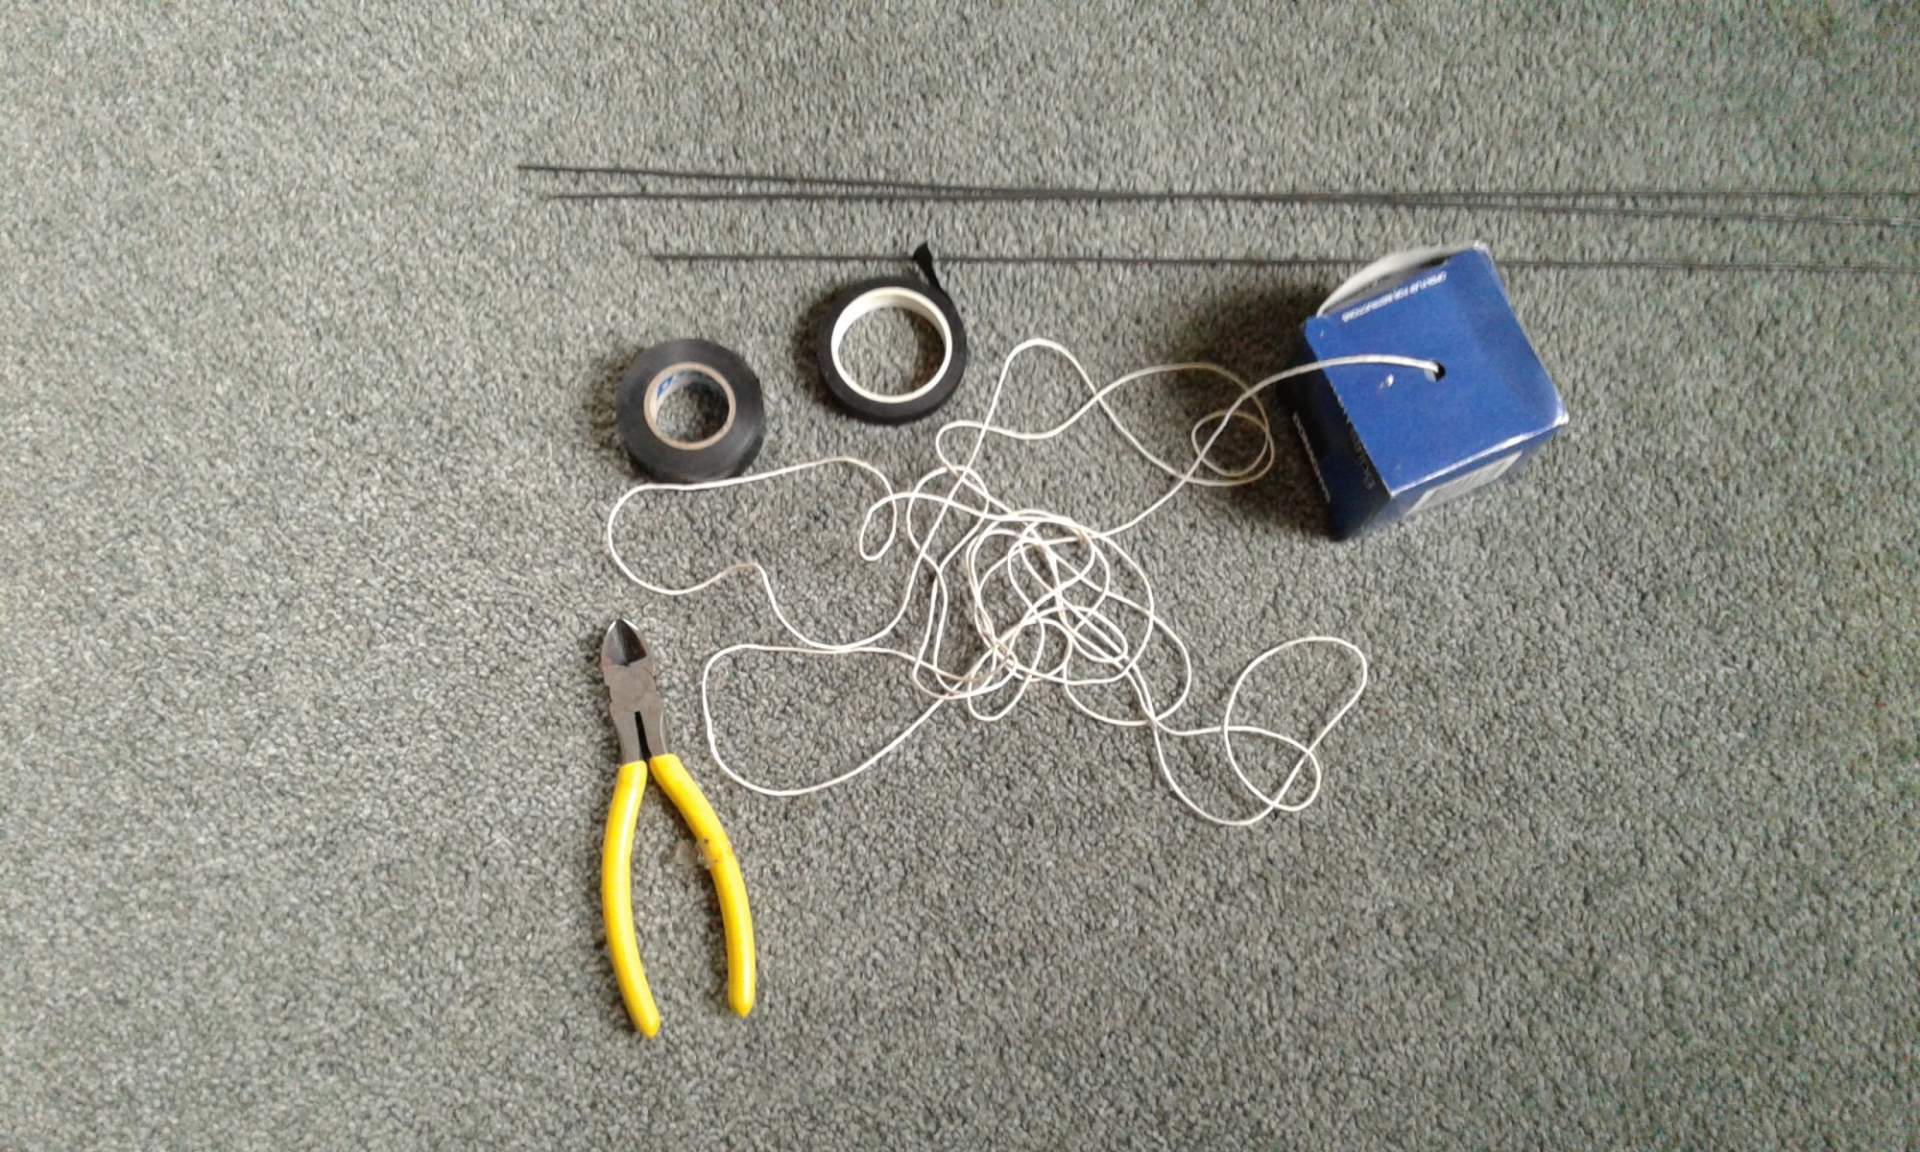
Photo of rod, string, tapes and pliers
To construct the design
Step 1: wipe clean rods with a paper towel
Step 2: join rods together with insulation tape with an overlap of 4 cms
Step 3: cover rods with paper tape
Step 4: bend rods take pliers hold the wire with the pliers then bend with palm of the hand, turning the wire as you go for direction
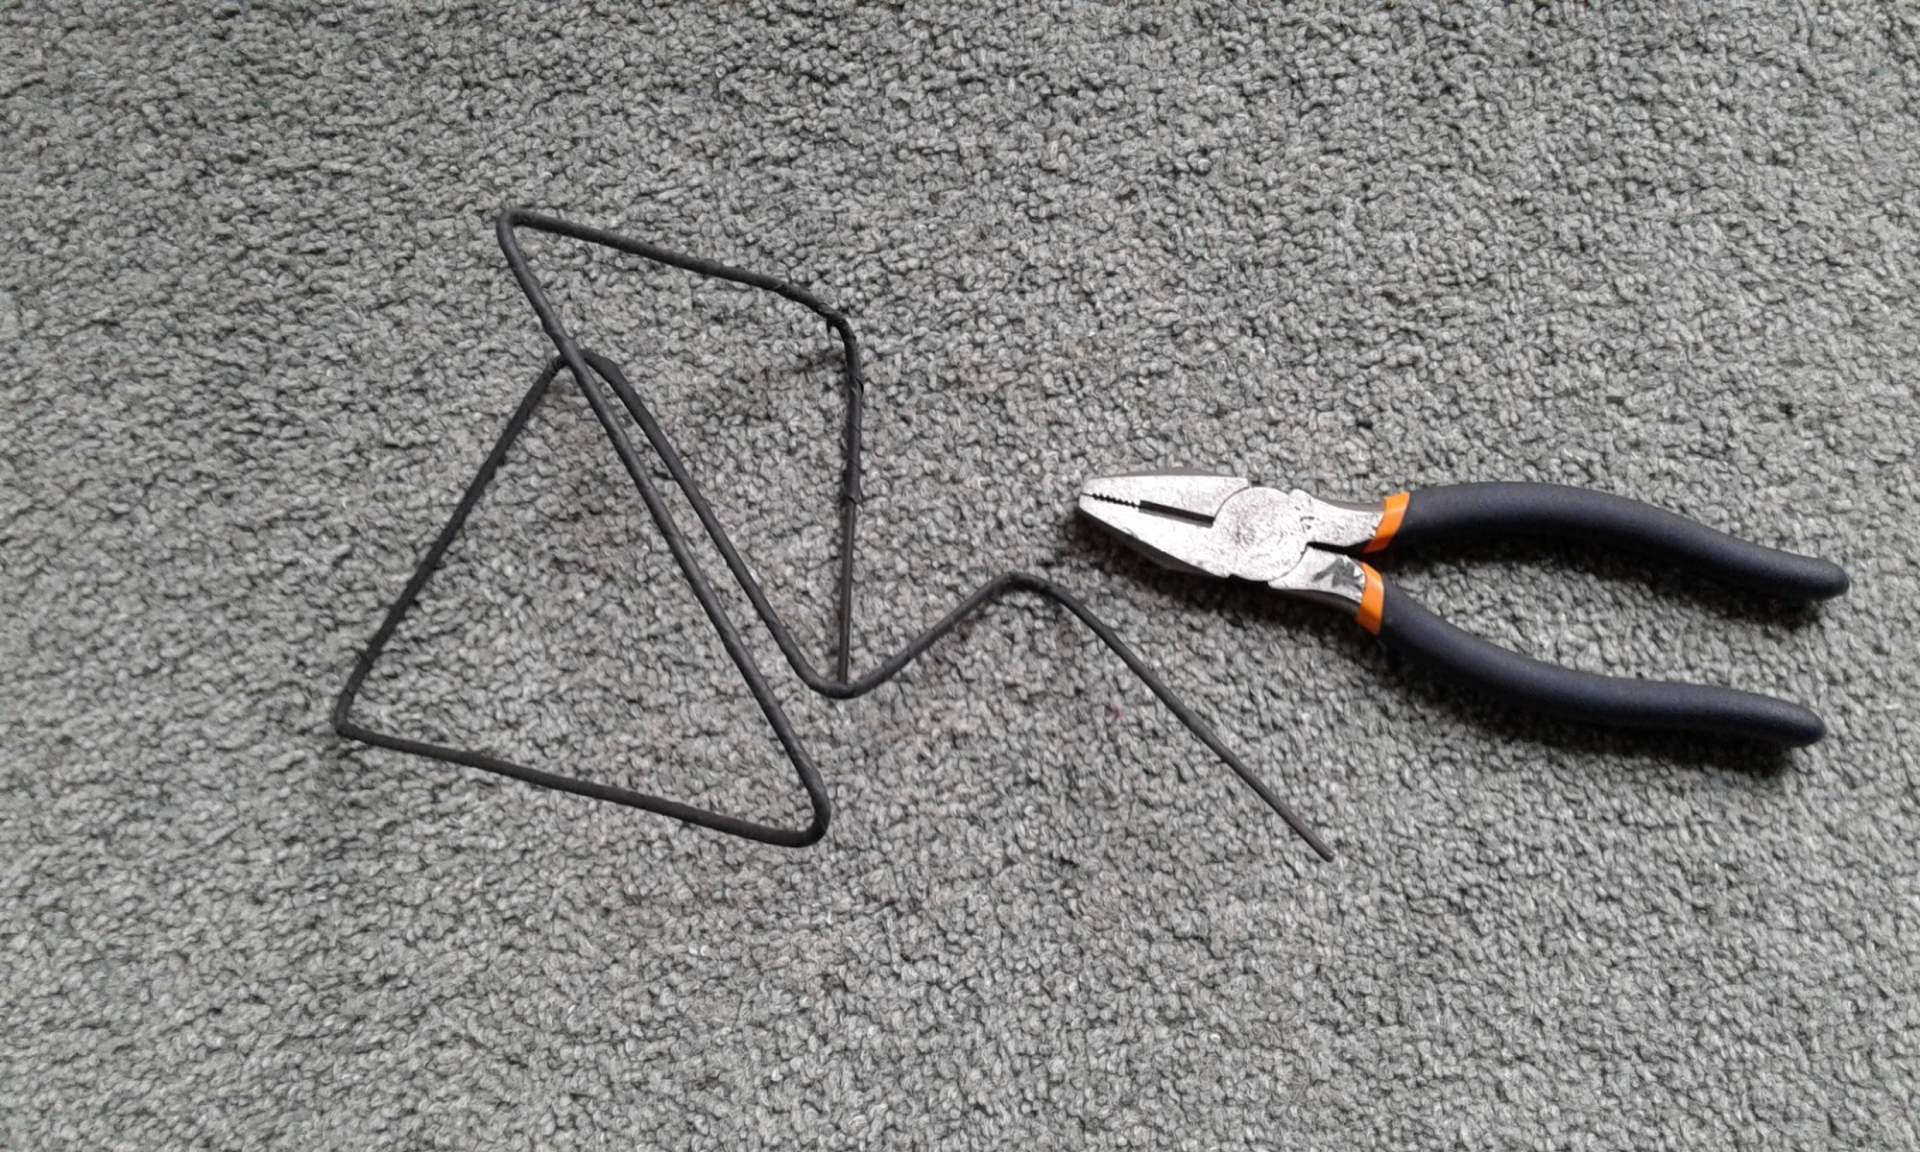
Photo of bent rods and pliers
Adding the string
Step 5: Wind on the string by using a kebab stick. Hold this over at different angles to see where you want the string to fling, wind the string from rod to rod, making sure the string is taut.
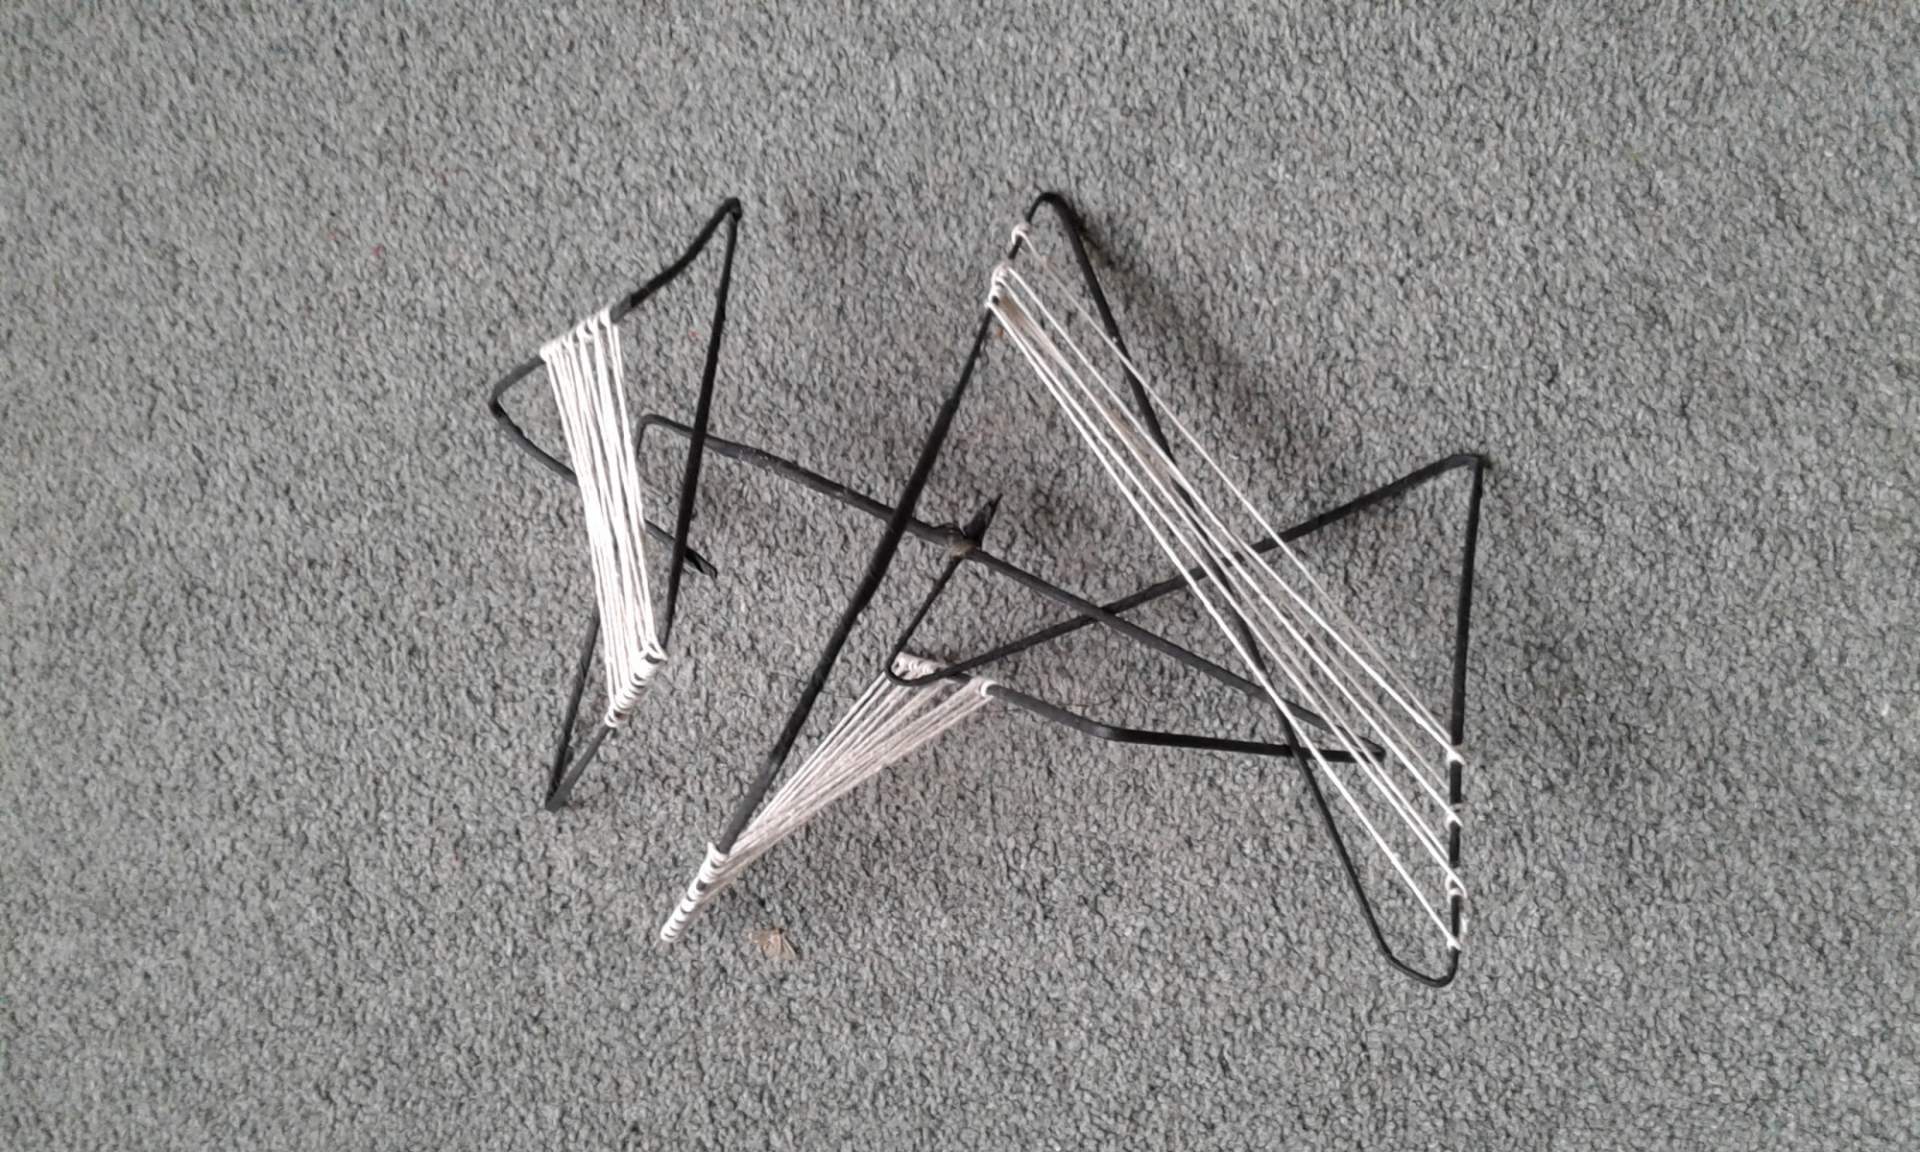
Photo of adding string
To complete the design
Step 6: Placement of plant material. Place in a contemporary manner rather than a graduated placement. E.g. two flowers at the top and one lower down or opposite Foliage in an upright placement.
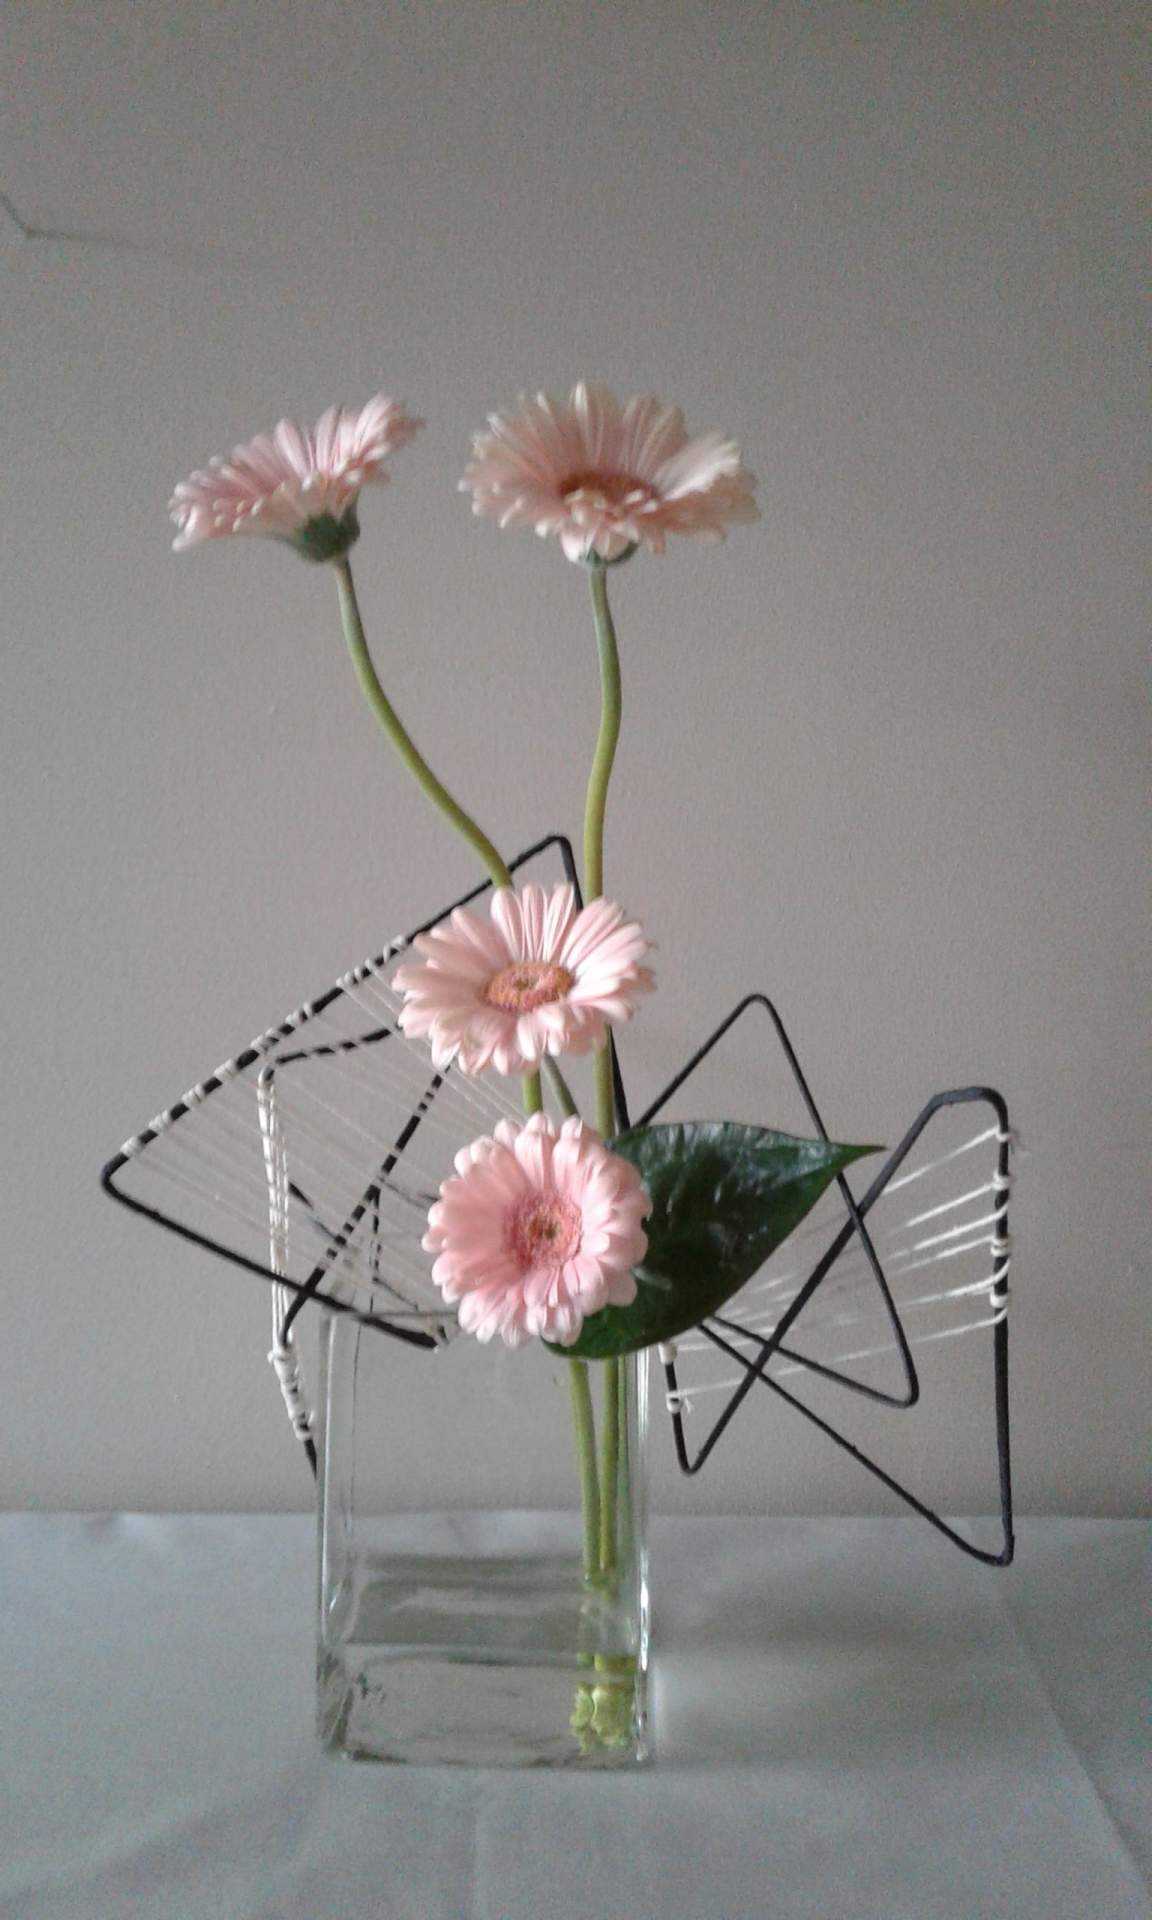
Photo of finished design

